
Feeling a little lost when you look at your e-bike's moving parts? You're not alone! Before you even think about picking up a tool, let's just take a moment to understand what we're looking at. Many common bicycle kit repair tasks seem tricky at first, but they're often much simpler once you know what's what.
Think of it like getting to know a new friend. Once you learn the basics, everything becomes much more comfortable. Having the right tools makes all the difference, and our Biktrix All-in-One Tool Kit has everything you need to get started with confidence.
Your Friendly E-Bike Repair Starting Point
You don't need to be a bike mechanic to handle simple e-bike fixes. Let's just have a quick chat, like we would over coffee in our Vancouver showroom, to gently pull back the curtain on the key parts of your e-bike. Getting familiar with these components is your first step toward feeling confident enough to sort out minor issues on your own.
At its heart, your e-bike runs on a team of three main parts working together.
- The Controller (The Brain): Usually tucked away out of sight, this is the command centre. When you pedal or use the throttle, it tells the motor how much power to give you. It’s the smart part of the bike.
- The Battery (The Heart): This is your powerhouse. It holds all the energy your e-bike needs to help you cruise along the Stanley Park Seawall in Vancouver or flatten the hills in Kelowna. Keeping it charged is the key to a great ride.
- The Motor (The Muscle): This is what gives you that wonderful "whoosh" when you need a boost. It takes orders from the brain (controller) and uses power from the heart (battery) to make pedalling easier.
Want to see how this team works together? Our simple guide on how an electric bike works is a great place to learn a little more without getting technical.
Getting to Know Your Basic Toolkit
Beyond the electrical parts, you still have the classic bicycle components. For those, a basic bicycle repair kit is your best friend. It’s not full of intimidating gear; it’s packed with simple, handy tools designed for the most common hiccups you might run into on a ride through Edmonton's river valley or along Saskatoon's Meewasin Trail.
The goal isn’t to turn you into a master mechanic. It’s about building the confidence to handle the basics—like a flat tire or a loose bolt—so you can spend more time enjoying the ride.
Knowing what each tool is for is half the battle. Soon, you’ll see that a common bicycle kit repair is something you can absolutely handle. And hey, if you're ever near our Biktrix showrooms in Calgary or Victoria, pop in! We're always happy to show you these tools in person and answer any questions.
Finding the Cause of Common E-Bike Problems
Alright, let's play detective. Nothing is more frustrating than getting ready for a ride only to have your e-bike refuse to start. Before you worry, take a deep breath. Most of the time, the fix is surprisingly simple and doesn't require a trip to the shop.
The first place to look is always the most obvious. Is the battery clicked in all the way? Is it actually charged? A loose or uncharged battery is the number one reason an e-bike won't start. After that, just run your eyes over the main wires. Give each connection a gentle push to make sure everything is snug.
This diagram shows you the simple path power takes and where to look—from the controller (the brain), to the battery (the heart), and finally to the motor (the muscle).
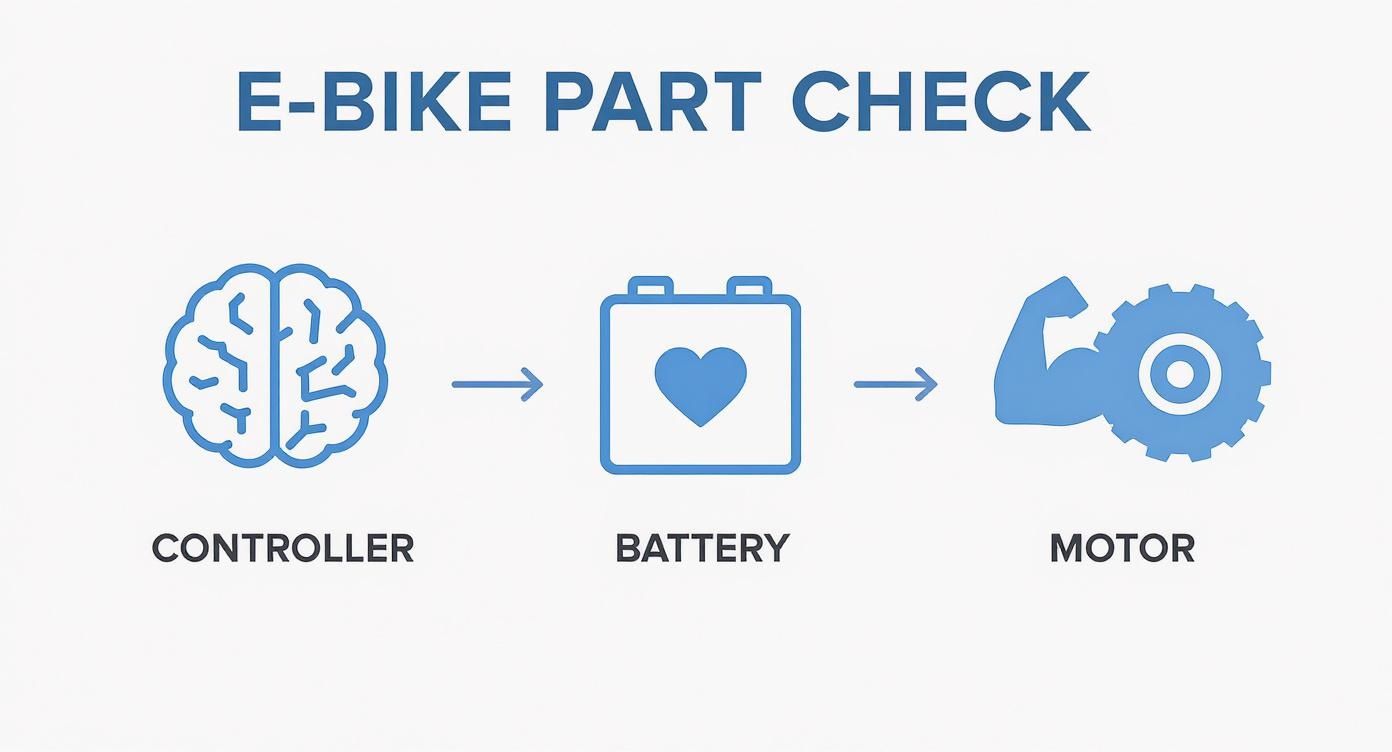
Following this path lets you check the easy things first before thinking it's a bigger problem.
Where to Look First When Something's Not Right
If the basics seem okay, it’s time to look a little closer at a few other common spots. You won't need any special tools for these quick checks—just your eyes and a bit of patience.
- Check the Display: Is it completely dark? This usually points right back to a battery or connection issue. If the screen is on but flashing a code, make a note of it. That little code is a big clue that will help you (or our support team) figure out the problem much faster.
- Inspect the Brake Levers: Your e-bike has a safety feature that cuts power to the motor when you brake. If a brake lever is sticky or even slightly pulled, it will stop the motor from working. Give them a quick wiggle to make sure they spring back into place freely.
- Look at the Pedal-Assist Sensor: This is a small disc with magnets located down by your pedals. If it gets bumped out of place or covered in dirt, it can't tell the motor that you're pedalling. Often, a simple wipe-down is all it needs.
When you're dealing with a trickier electrical issue, a simple tool can be a great helper. Having one of our affordable multimeters in your toolkit turns a frustrating guessing game into a clear answer by letting you see exactly where power is—and isn't—flowing.
Going a Little Deeper
To get comfortable with fixing things, it helps to follow some effective maintenance problem-solving strategies. This just means approaching any repair with a simple, logical plan.
Learning how to handle these small troubleshooting steps on your own is incredibly empowering. It's a skill that grows with you, and you're not alone. More and more people are discovering the joy of cycling and learning how to care for their own bikes.
A friendly reminder: If you ever feel out of your depth, please don't hesitate to reach out. Our Canadian support team is always here to guide you. The whole point is to get you back on the road, enjoying your ride.
Hands-On Fixes with Your Repair Kit
Okay, we've covered the electrical side. Now it's time to get our hands a little greasy with the more traditional, mechanical parts of your bike.
Think of this as the core of bicycle kit repair. Learning these skills makes you a truly self-reliant rider, whether you're sorting out a quick fix before a ride along the Vancouver seawall or handling an issue mid-journey on a Kelowna trail.
Let's start with the most common task for any rider: the flat tire. It’s going to happen. Knowing how to deal with it is one of the most useful skills you can have.
Fixing a flat is a bit like learning a new recipe; the first try might feel clumsy, but it quickly becomes a comfortable routine. You'll use tire levers—those small plastic pry bars in your kit—to gently pop one side of the tire off the wheel. After that, you just pull out the inner tube, find the small hole, and apply a patch. Simple as that.
- Best for: A quick, all-in-one solution. Our Biktrix Tire Repair Kit has all the essentials packed and ready to toss in your bag.
Fine-Tuning Your Brakes and Gears
Next up are two adjustments that make a huge difference in your ride's quality and safety. Well-adjusted brakes give you confident, predictable stopping power. Properly tuned gears shift smoothly without any frustrating clunking or skipping.
For your brakes, the most common tweak is adjusting the cable tension. You'll usually find a small "barrel adjuster" knob right where the brake cable enters the brake lever on your handlebar.
- Turn it out (counter-clockwise): This tightens the cable, bringing the brake pads closer to the wheel for a quicker response.
- Turn it in (clockwise): This loosens it, giving the pads more space if you hear them rubbing.
It's a lot like tuning a guitar—small turns can make a big difference. While it's for a different device, this excellent DIY battery replacement guide is a great example of how learning basic repair principles can help you with all sorts of projects.
Gears work in a similar way. If your chain is slow to shift to an easier gear, you probably need to add a bit of tension by turning the barrel adjuster on your shifter. If it’s slow to drop to a harder gear, you’ll want to loosen it. It's a subtle process of tiny adjustments until every click gives you a clean, crisp gear change.
The real secret to learning these repairs is just patience. Don't be afraid to make a small adjustment, ride a few feet to test it, and then adjust again. Each little tweak teaches you something new.
These basic mechanical skills are the foundation of good bike care. Not only will they save you money and trips to the shop in Saskatoon or Victoria, but they also give you the confidence to ride further, knowing you can handle little hiccups along the way.
When to Call for Professional E-Bike Help
There's a real satisfaction in fixing your own bike, but part of being a smart, safe rider is knowing your limits. Some issues need specialized tools and a lot of experience to get right. Your safety is always the top priority, and sometimes the best tool in your kit is the phone.
Think of these as the big red flags. If you run into any of them, it’s time to stop what you're doing and call for backup.
Signs It's Time for a Professional Touch
If you notice any of the following, it’s best to put the tools down and get an expert opinion. Trying to fix these complex problems without the right training can turn a small issue into a major, costly repair—or worse, a safety hazard.
- Strange Noises From the Motor: Any grinding, clicking, or whining from your motor is a serious warning. These sounds often point to internal problems with gears or bearings that can't be fixed at home.
- Error Codes That Won't Go Away: You’ve checked every connection, but that error code on your display just won't quit. This is a classic sign of a deeper problem with the controller, a sensor, or the motor itself.
- Visible Battery Damage: Never take a chance with a damaged battery. If you see any cracks, swelling, or signs of leaking from the case, stop using it immediately. Disconnect it from the bike and contact a professional right away.
Sometimes the smartest tool in your bicycle kit repair arsenal is your phone. Knowing when to ask for professional help is just as important as knowing how to use a wrench. It ensures a safe fix that gets you back on the road with peace of mind.
E-bikes are more complex than regular bikes, which is why skilled technicians are so important. Certain jobs, especially anything involving the core electrical system, are best left to the pros who have the right training and tools.
Finding the Right Help in Your Community
For Biktrix riders, your first call should always be to our dedicated Canadian support team. Our experts know your bike inside and out. They can walk you through checks over the phone, handle warranty support, and help you find a trusted local mechanic.
- Best for: Direct, expert advice. Explore our comprehensive BiktrixCare support options to get started.
If you’re looking for a local shop in a city like Victoria or Edmonton, don’t be afraid to ask about their experience with e-bikes. A good mechanic will be happy to talk you through their process and give you confidence that your ride is in excellent hands.
Simple Habits for a Happy E-Bike
The best kind of bicycle kit repair is the one you never have to do. The secret to keeping your e-bike running smoothly for years is building a few simple habits into your routine. It’s about spending two minutes now to save yourself hours of hassle later.
This isn’t about adding a long list of chores. It’s about getting into a quick rhythm of care that protects your bike and keeps you safe every time you ride.
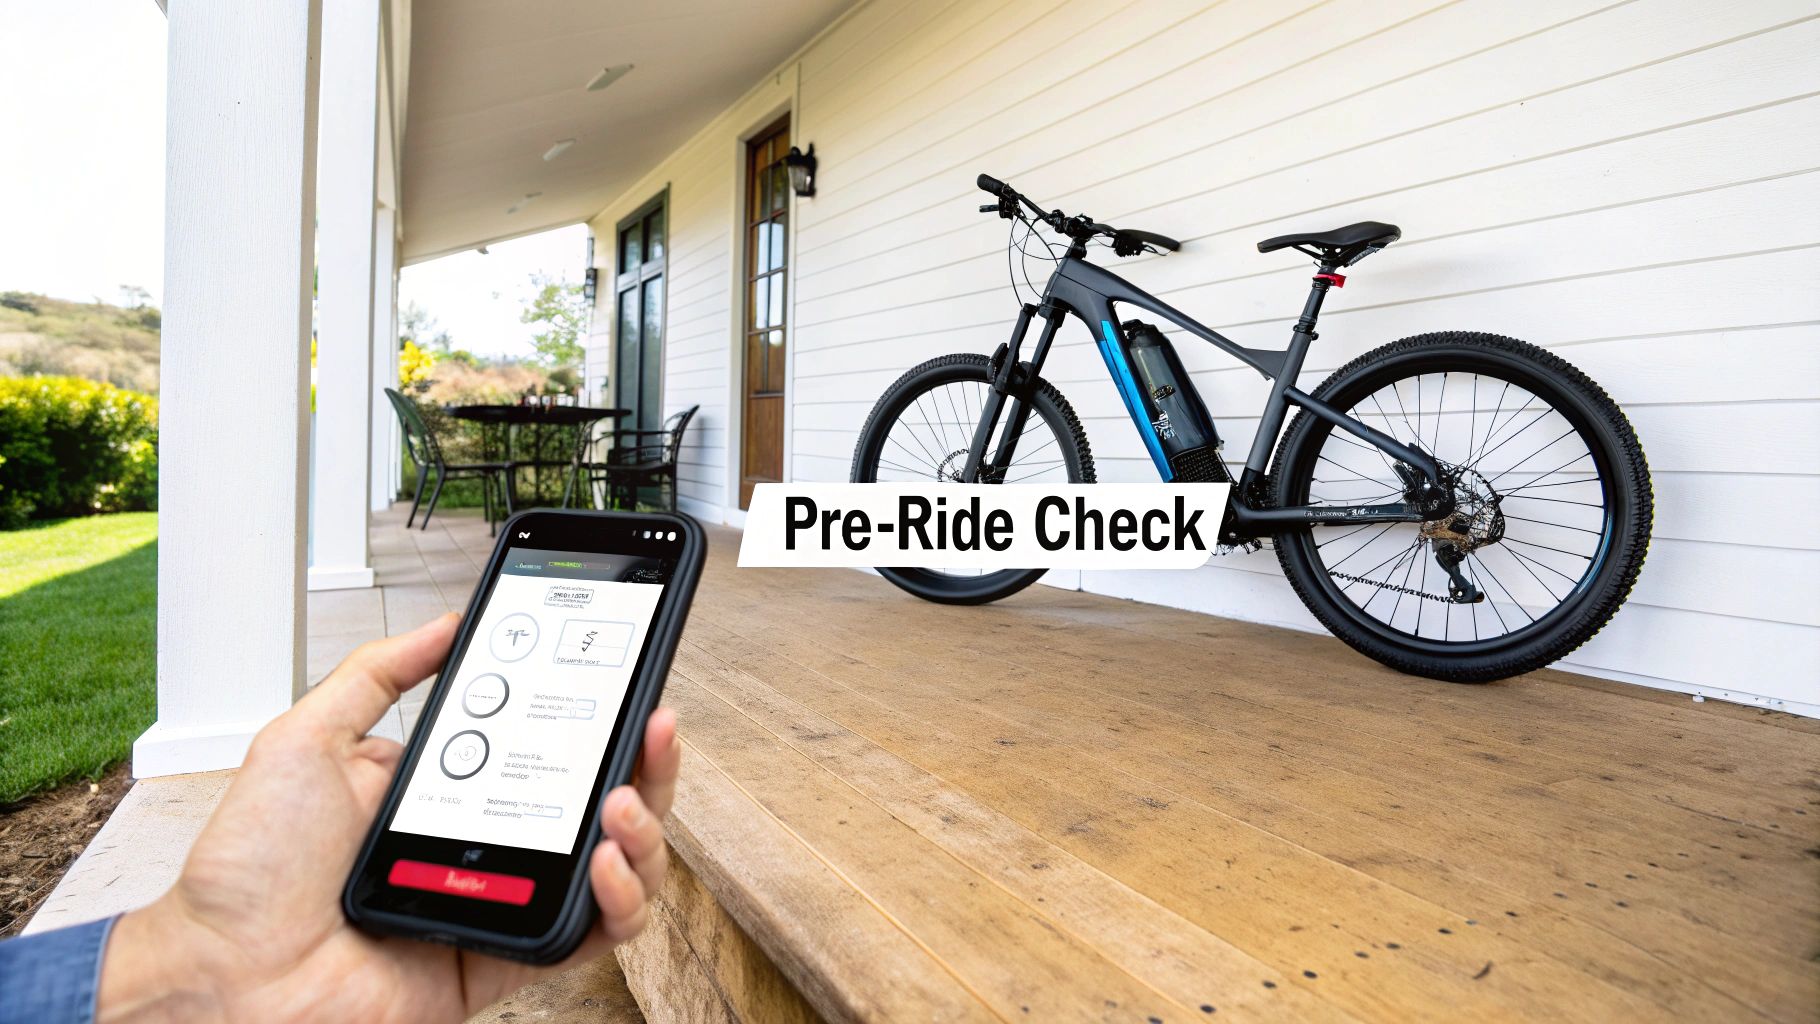
Your Two-Minute Pre-Ride Checklist
Before you head out, whether it's for a quick trip in Kelowna or a cruise along Victoria's coastline, get in the habit of this quick "ABC" check. It takes less time than making a cup of tea.
- A is for Air: Give your tires a good squeeze. They should feel firm, not soft and squishy. Riding on low tires is a sure way to get a flat and it makes your battery work harder.
- B is for Brakes: Squeeze both brake levers. Do they feel firm? You don't want them to feel spongy or pull all the way back to the handlebar. This is a critical safety check.
- C is for Chain: Give your chain a quick look. Does it look dry or is it caked in grime? A clean, oiled chain means a quiet, smooth ride and helps your parts last longer.
This quick check ensures your bike’s most important safety features are good to go.
Habits That Protect Your Bike
Beyond the pre-ride check, a couple of other simple habits will go a long way in extending the life of your e-bike's most important parts—especially the battery.
Battery Best Practices
Your battery is the heart of your e-bike, so treat it with care.
- Avoid Extreme Temperatures: Your battery is happiest at room temperature. Try not to leave it in a cold garage overnight or in a hot car on a sunny Vancouver afternoon.
- Don't Store It Empty: If you're putting the bike away for the winter, try to store the battery with a charge between 40% and 80%. Leaving it completely full or empty for a long time can shorten its lifespan.
Keep It Clean and Oiled
Wiping your chain down and applying a bit of chain oil every few rides will stop grit from wearing away at your gears.
If you want to see how this proactive care pays off, we break it down in our article on the true cost of electric bike maintenance. These little routines are what make sure every ride is as smooth and fun as the last one.
Answering Your Bicycle Kit Repair Questions
We hear from riders all across Canada, from Calgary to Vancouver, and we love helping you feel more confident on your bike. Here are some honest answers to common questions about e-bike repair.
What are the must-have tools for a beginner?
You don't need a huge toolbox to get started. A few key items will handle most common issues. A simple kit with tire levers, patches, a multi-tool with Allen keys, and a small pump is the perfect starting point. This will see you through the most frequent hiccups, like a flat tire or a loose bolt.
- Best for: A complete, organized solution. Our All-in-One Tool Kit has everything you'll need in one compact package, so there’s no guesswork.
My display is on, but the motor won't work. What should I do?
This is a very common e-bike puzzle, but the solution is usually simple. Before you worry, run through these quick checks.
- Check your brake levers. As a safety feature, your motor won't work if a brake lever is even slightly pulled. Wiggle them to make sure they're fully released.
- Inspect the pedal-assist sensor. This is a small disc with magnets near your pedals. Make sure it’s clean and hasn't been knocked out of place.
- Gently push on the wire connections. A bumpy ride can sometimes loosen a wire. A quick, gentle push on the main connectors can often solve the problem.
How often should I do maintenance on my e-bike?
A little bit of regular attention goes a long way. The quick pre-ride "ABC" check of your tires and brakes is a fantastic habit.
Beyond that, a simple monthly check-up is a great idea. Take a few minutes to clean and oil your chain and check that important bolts are snug. This proactive approach is the best way to care for your e-bike.
We also highly recommend a full professional tune-up at least once a year. This is especially smart before the main riding season starts in places like Saskatoon or Edmonton. It ensures your bike is safe and ready for a full season of adventure.
Ready to feel more confident on your ride? The Biktrix All-in-One Tool Kit has all the essentials you need to handle common adjustments and repairs right at home or on the trail. Be prepared for your next adventure.
- Our Recommendation: Check out the Biktrix All-in-One Tool Kit today.
